A drill, drill bits, and a few simple hand tools are required
Please note: The stock bolts on some bikes are long enough to attach the brackets to the bike, but most aren't. We do not provide longer bolts for this purpose since there are so many variations. All other hardware comes with the saddlebag kit.
I recommend you do the complete installation before the bags are painted. The less you have to handle them after painting, the better off you'll be.
First attach the four brackets to the fender/seat rails. You will probably need longer bolts since the brackets are 1/2 inch thick. Angle the brackets rearward at the same angle as the slant on the front of the bags (about 33 degrees). You'll notice a 3 degree bend at the upper end of the bracket. This is the same angle as on the side of the bag and allows the bags to hang level with each other. Attach the brackets to the fender rail with the bend going out.
Once the brackets are installed, and having someone assist you if necessary, hold the right side bag in the best position that suits you and also leaves at least 1 inch between the bottom of the bag and the exhaust pipe. (On most bikes there's plenty of room). Do the right side first since that is the side with the pipes on most bikes. Usually they look better the lower you get them but be aware that the upper holes in the bags can't be so high as to cause the rubber spacer which goes between the bag and the mount to interfere with the lid. So the upper holes needs to be at least 1 1/4 inches below the lip of the bag.
Once you have the bag in the optimum position, reaching in from the inside of the brackets and with a short scribe, (like a nail, screw or whatever) mark on the bag where the holes will need to be drilled by placing the scribe through the holes in the brackets. Drill the holes using a 5/16 inch drill bit. (That's a little large since the bolts are only ¼ in. but allows for easier alignment. Then, before attaching the bag to the mount, use the right side bag as a template for marking the holes in the left bag. One option is to make a paper template of the right bag holes after you drill it and then place the template on the left bag. This will ensure that they are symmetrical.
Then mount both bags using the 1/4 in. bolts, fender washers, rubber spacers, and locknuts. The fender washers go inside the bag with the rubber spacer going between the bag and the bracket. Make sure you are satisfied with the installation. On some installs you may have to compress the rubber spacers in varying amounts to ensure the bags aren't tweaked. Now uninstall them for painting, taking note of how the hardware is attached. Pay particular attention to the fasteners for the latch keeper on the lid. The nuts go on the outside of the lid.
The nuts for the latch itself go on the inside of the bag with the plastic spacer going between the latch and the bag. This provides proper alignment for the latch and latch keeper.
Notes on Painting
Bags are fresh from the molds and will need to be prepped for painting. Painting fiberglass is much the same as painting a fender on a car. Wash with solvent, sand, prime, block sand, re-prime if necessary & paint.
Also it's a good idea to mark which lid goes on what bag. Makes for a better fit when you reassemble them.
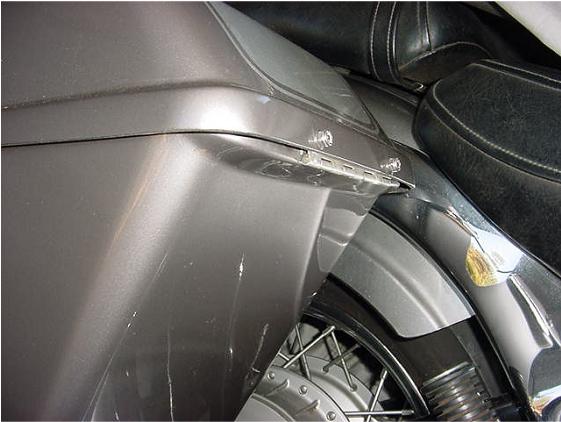
During the reassembly process, reattaching the hinge properly can be confusing. Set the lid on the bag, close the hinge and tuck it between the lid and the bag with the pivot point down. The only part of the hinge showing will be the pivot/pin side. See photo below.
Additional Saddlebag Information
1. These bags are fresh from the mold and may contain some minor surface imperfections due to normal shrinkage of the fiberglass resins and/or some mold transfer marks. These will easily sand out and/or can be filled with surface putty during the paint prepping process. Use a hand block sander or a dual action air sander.
2. Although locking nuts are used, some Locktite thread locker might be a good idea after the final installation. Some bikes vibrate a lot and can loosen the best of locking nuts.
3. Under the latch handle there are two small Phillips head screws which hold the locking mechanism in place. Periodically check these screws and tighten if necessary so the assembly won't vibrate out .
4. If your seat isn't wide enough to catch the lid when it is open, you can make a simple and effective stop by using a section of small braided cable (the type used for hanging pictures) and a couple of wire terminal ends. Use pop rivets or #4 machine screws/nuts to attach to the bag and lid.
If you have any questions about prepping for paint or the installation process, just text, call, or email


